Do you love Halloween? I know I do! One of my favorite things to do is decorate my house for the holiday. This year, I decided to make some simple Halloween votive holders. They're easy to make and add a touch of spooky fun to any room. Plus, they make great party decorations! Want to learn how to make them yourself? Keep reading for instructions.
Easy and Fun DIY Halloween Votive Holders
When I start to decorate for Halloween I LOVE decorating outdoors for the kids that go trick or treating. We love getting the cement headstones from Target for my yard. Also, we love to decorate with huge blow up decorations.
I have learned how to do this on a budget though! We use the places I get free Amazon gift cards from, cash out for Target instead, and get Halloween decor. I use the method paid with Target's Buy one Halloween costume and get one free sale to get my kids Halloween costumes for free!
Related: 17 DIY Halloween Costumes
Can you use a different size Terra Cotta Pot?
Yes, you will obviously need to adjust the supplies you need to use the bigger pots but you can use whatever size pot you'd prefer.
Do you have to use spiders?
No of course not! You can use cats, bats, or whatever Halloween items you'd like to put on your DIY Halloween Votive.
Can you use a different colored ribbon?
Yes, this is totally customizable so you can switch out whatever items or colors you'd prefer.
Related: Burlap BOO Halloween Wreath
What tools do I need to make this Halloween Votive Holder?
Terra Cotta Flower Pot – These pots are great for both indoor and outdoor plants, and they can be painted or left natural for a rustic look. Not only are they stylish, but terra cotta flower pots are also very durable. They're made from a type of clay that is fired at high temperatures, making them resistant to cracking and chipping.
Scissors – With scissors, you'll be able to quickly and easily cut through paper, fabric, tape, and more crafting. They're the perfect tool for any project, big or small.
Hot Glue Gun – The small size of the glue sticks makes them perfect for precise applications, and the clear glue is practically invisible once it dries.
Paint Brushes – These paint brushes are made with high-quality materials and are designed to provide a smooth, even application of paint. With our wide variety of shapes and sizes, you're sure to find the perfect brush for your next project!
Related: 31 Fun and Easy DIY Halloween Decorations
Halloween Votive Holders Supplies

Small terra cotta flower pot
Green craft paint
Paintbrush
Purple ribbon
Plastic spider
Scissors
Hot glue gun
Green gravel
Battery operated votive
Related: DIY Jack O Lantern Mason Jar
How to make Halloween Votive Holders
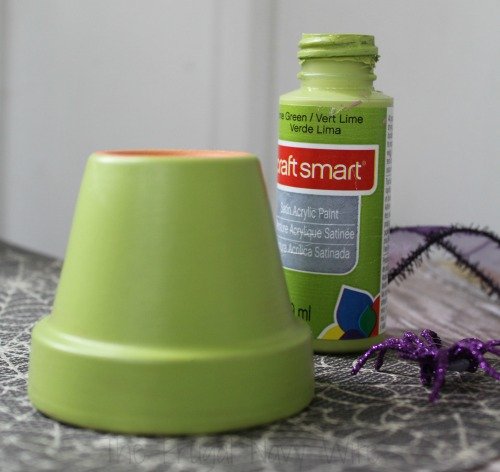
Begin by applying two coats of paint to the flower pot. You might need to do a third depending on the type of paint you use. You don't want any of the original brown to show through! The terra cotta will soak up the paint so allow time to dry before applying each coat.

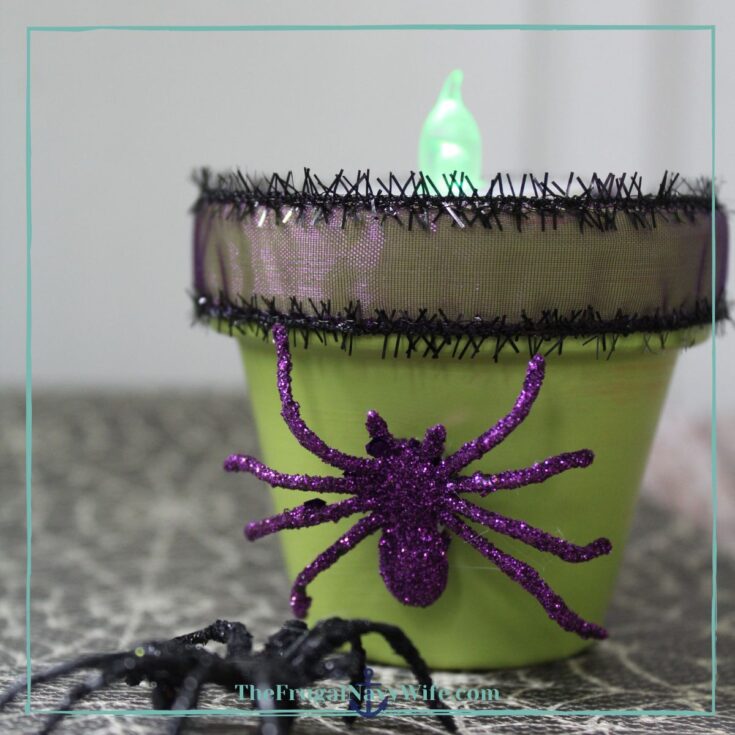
Once you have the desired amount of paint on and the paint dries, cut a length of purple ribbon and tie it around the top of the pot. Add a dab of glue to secure it into place. The length needed will vary depending on the size of your pot.
Add a small piece of paper to the bottom of the pot. This will keep the gravel from falling through the drain hole. You can also add a sticker of some kind. I suggest taping the paper or if you use some ribbon then hot glue it.
Add a dab of glue to your spider and press it to the front of the flower pot. This is also where you can great creative and add in other Halloween items such as bats, cats, and more!
Related: DIY Candy Corn Jar

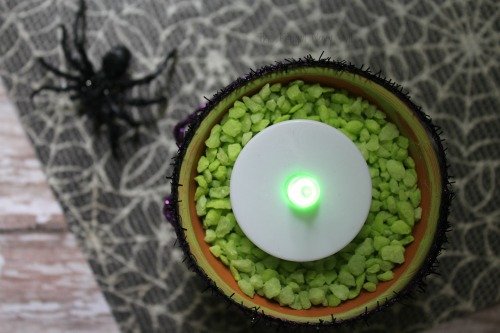
Fill the flower pot up with the green gravel. I grabbed a pack at Dollar Tree but if you can't find it you can also get green gravel on Amazon.
Nestle the LED battery-operated votive inside of the flower pot. I suggest one with a green light to go with the colors of the pot.

Your Halloween votive holders are now ready to be displayed.
You can do a witch one in purple, or a candy corn one in orange would also look great! Do all 3 and it would make a great mantle piece!
Halloween Votive Holders

Want to decorate your house for Halloween with some DIY crafts? These DIY Halloween Votive Holders are not only easy but super fun!
Materials
- Small terra cotta flower pot
- Green craft paint
- Paint brush
- Purple ribbon
- Plastic spider
- Green gravel
- Battery operated votive
Tools
- Scissors
- Hot Glue Gun
Instructions
- Begin by applying two coats of paint to the flower pot. You might need to do a thrid depending on the type of paint you use. You don't want any of the original brown to show through! The terra cotta will soak up the paint so allow time to dry before applying each coat.
- Once you have the desired amount of paint on and the paint dries, cut a length of purple ribbon and tie it around the top of the pot. Add a dab of glue to secure it into place. The length needed will vary depending on the size of your pot.
- Add a small piece of paper to the bottom of the pot. This will keep the gravel from falling through the drain hole. You can also add a sticker of some kind. I suggest taping the paper or if you use some ribbon then hot glue it.
- Add a dab of glue to your spider and press it to the front of the flower pot. This is also where you can great creative and add in other Halloween items such as bats, cats, and more!
- Fill the flower pot up with the green gravel. I grabbed a pack at the Dollar Tree but if you can't find it you can also get green gravel on Amazon.
- Nestle the LED battery operated votive inside of the flower pot. I suggest one with a green light to go with the colors of the pot.
- Your Halloween votive holders are now ready to be displayed.
Recommended Products
As an Amazon Associate and member of other affiliate programs, I earn from qualifying purchases.
Halloween is a favorite holiday for many people, and what’s not to love? There are so many fun ways to celebrate, from dressing up in costumes to decorating your home. This year, we wanted to give you a little inspiration for some easy DIY Halloween decorations using votive holders. Whether you want something cute or spooky, we’ve got you covered! So get creative and show us your finished products in the comments.


Leave a Reply