
I love doing Valentine's Day crafts with my kids on the weekends leading up to Valentine's Day. I like the ones we can use to decorate the house with the most. That is why this Valentine's Day Button Heart Popsicle Stick Frame Craft was so much fun to make.
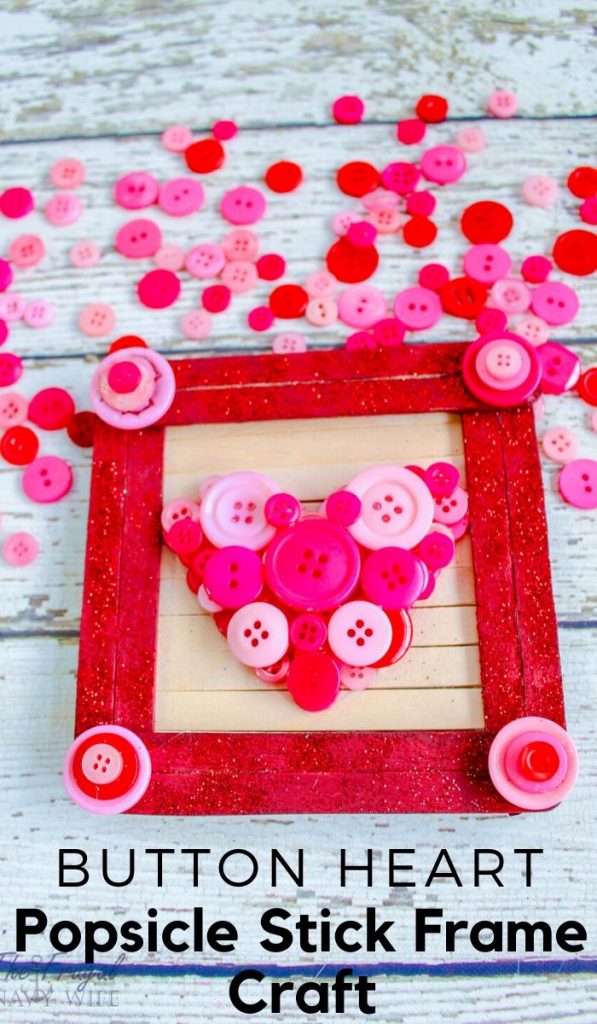
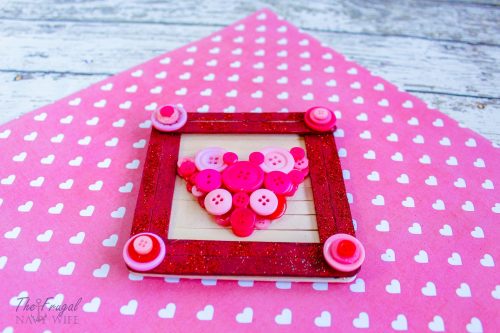
Easy Valentine's Day Button Heart Popsicle Stick Frame Craft
This Popsicle Stick Frame would also make a great gift for parents and grandparents. The colors on this craft can also be switched out to make any holiday. Green for St Patricks Day with clover or Red, White, and Blue for July 4th with a star in the middle.
Related: Valentines Day Crafts – DIY Button Art Heart Decor
Now on to the craft!
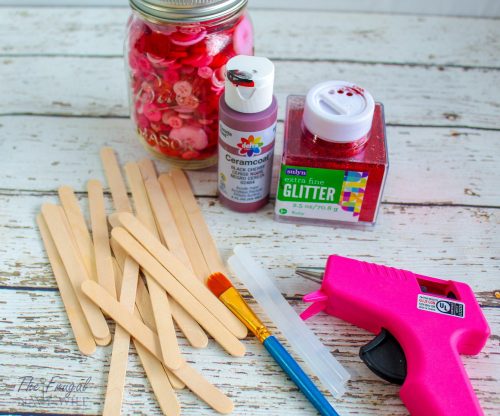
Items Needed for the Popsicle Stick Frame Craft
18 Popsicle Sticks (plus a few extra)
Yarn (optional)
Directions for Valentine's Day Button Heart Popsicle Stick Frame Craft
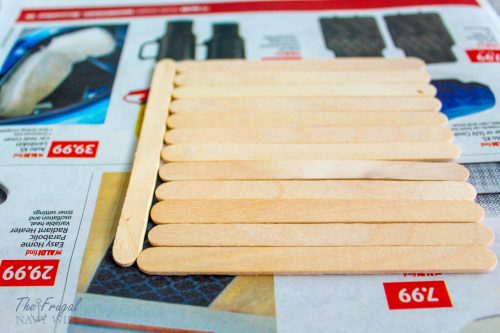
Start by lining up your popsicle sticks to make your board. They should be the length of one popsicle stick as shown in the picture.
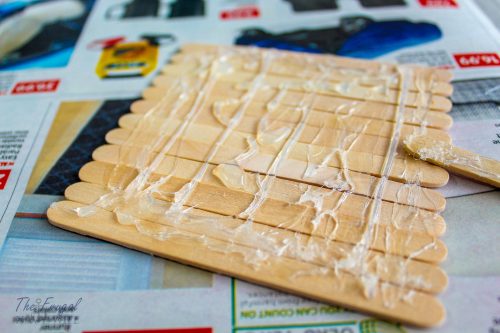
Then hot glue them together. It doesn't have to look pretty this will be the back no one will see. I took a popsicle stick and spread the hot glue around as well.
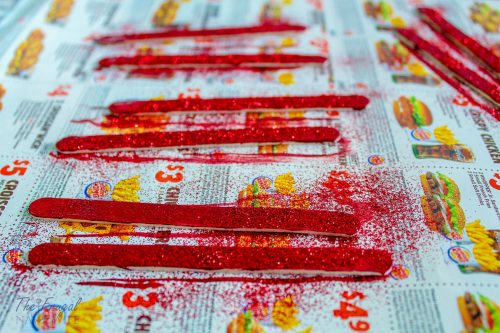
While the board is drying take 8 popsicle sticks and paint them red. As they are wet sprinkle on your glitter. You will want to paint the side and end as well.
Set aside to let dry.
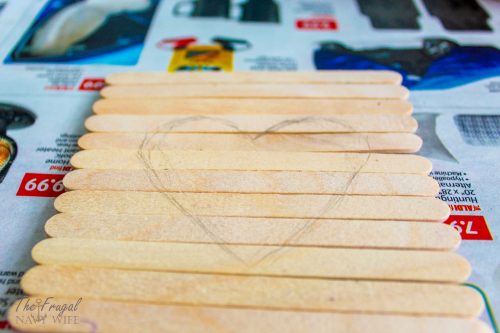
Now take your popsicle stick ‘board' and using a pencil make a light heart outline.

Then start getting an idea of where you will place the buttons as your hot glue gun heats up. Then start gluing. You will want to use big buttons where you can.
Let the first layer dry and then pull away all the fine hot glue strings.

Then do your second layer of buttons. Use this layer to cover any empty spaces from the 1st layer.
Do a 3rd layer if you wish. Then set aside and let dry.

Glue your painted popsicle sticks together side by side in sets of two. Let dry.
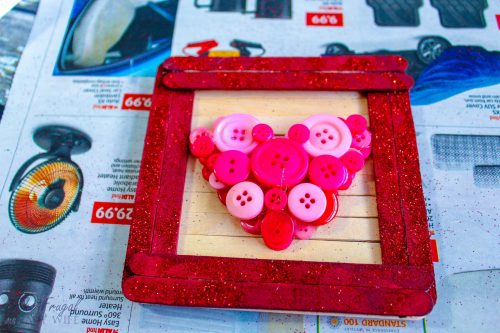
Then glue the paint sticks to your board with the buttons to form a frame. I suggest gluing the two sides that will cover up the side going opposite the way the board sticks are going it will give them extra support.
Then glue the other two sides. Let dry.
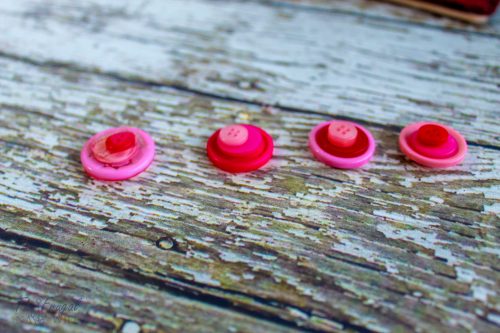
Sort your buttons and make 4 sets. A large, medium, and small stacked on top of each other as shown.
Glue them together and let dry. Once dry pull away any other fine glue strings. Then glue the buttons stacks to the corners of the frame.
Let dry and pull away any final fine glue strings and enjoy.
You can glue some yarn to the top to allow the frame to hang on the wall if you wish. I used command strips.
Button Heart Popsicle Stick Frame Craft

This Popsicle Stick Frame will make a great Valentine's Day gift for parents and grandparents. Change the colors on this craft to make it for any holiday.
Materials
- 18 Popsicle Sticks, plus a few extra
- Red Paint
- Fine Red Glitter
- Red and Pink Buttons
- Hot Glue and Hot Glue Gun
- Paint Brush
- Yarn , optional
Tools
- Hot Glue and Hot Glue Gun
Instructions
- Start by lining up your popsicle sticks to make your board. They should be the length of one popsicle stick as shown in the picture.
- Then hot glue them together. It doesn't have to look pretty this will be the back no one will see. I took a popsicle stick and spread the hot glue around as well.
- While the board is drying take 8 popsicle sticks and paint them red. As they are wet sprinkle on your glitter. You will want to paint the side and end as well.
- Set aside to let dry.
- Now take your popsicle stick 'board' and using a pencil make a light heart outline.
- Then start getting an idea of where you will place the buttons as your hot glue gun heats up. Then start gluing. You will want to use big buttons where you can.
- Let the first layer dry and then pull away all the fine hot glue strings.
- Then do your second layer of buttons. Use this layer to cover any empty spaces from the 1st layer.
- Do a 3rd layer if you wish. Then set aside and let dry.
- Glue your painted popsicle sticks together side by side in sets of two. Let dry.
- Then glue the paint sticks to your board with the buttons to form a frame. I suggest gluing the two sides that will cover up the side going opposite the way the board sticks are going it will give them extra support.
- Then glue the other two sides. Let dry.
- Sort your buttons and make 4 sets. A large, medium, and small stacked on top of each other as shown.
- Glue them together and let dry. Once dry pull away any other fine glue strings. Then glue the buttons stacks to the corners of the frame.
- Let dry and pull away any final fine glue strings and enjoy.
Will you be doing this Easy Valentine's Day Button Heart Popsicle Stick Frame Craft with your kids?
Leave a Reply