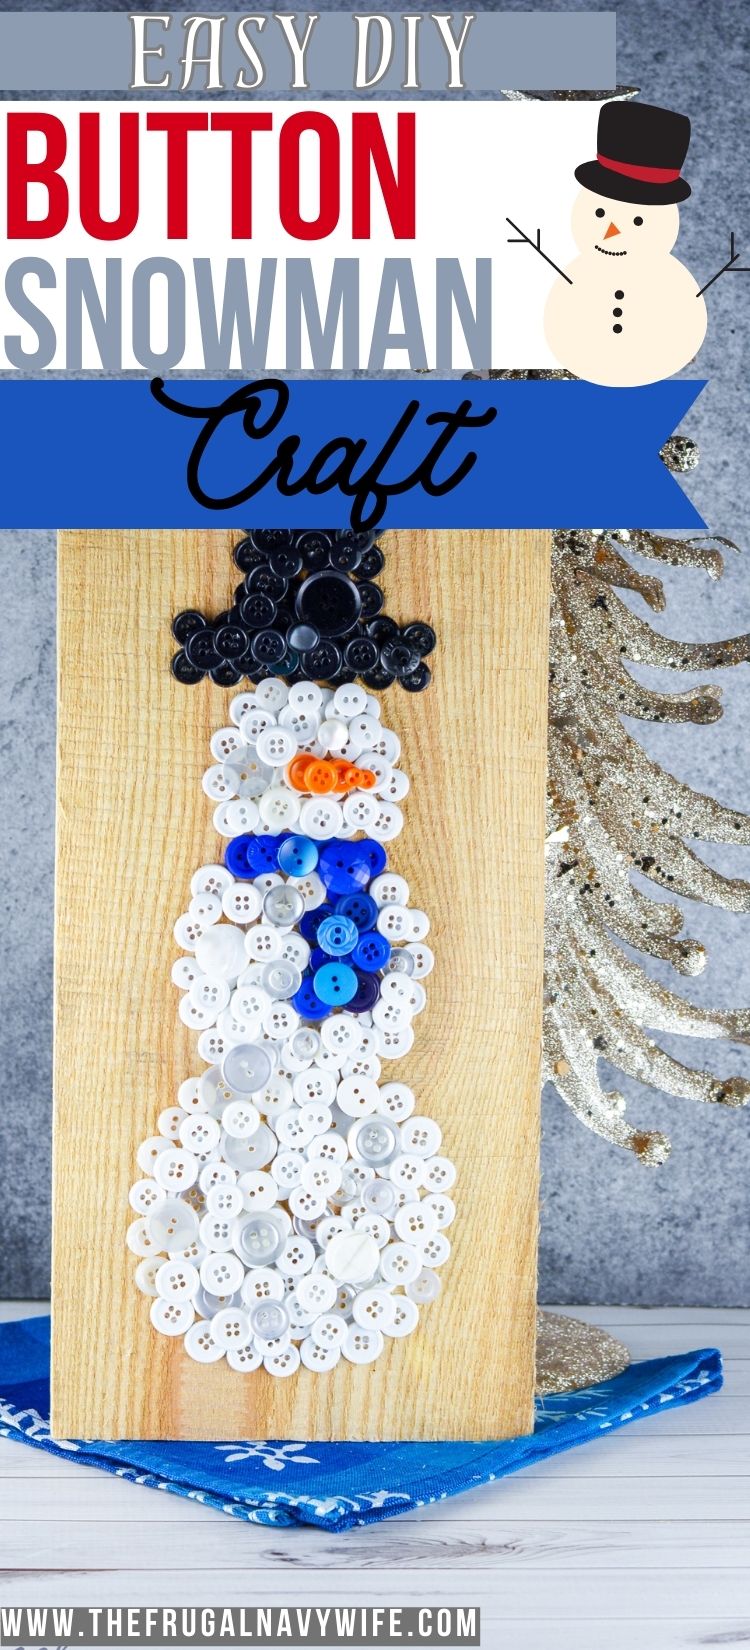
This charming craft project allows you to unleash your creativity and create an adorable button snowman using different sizes and colors. Whether you're looking for a fun activity to do with kids or want to add a touch of festive cheer to your home decor, this craft is perfect for all skill levels. As you gather your buttons and prepare to embark on this creative journey, get ready to bring these cute snowmen to life and enjoy the process of crafting something truly special. Let your imagination shine as you create your very own button snowman masterpiece!
Can I wash the button snowman craft if it gets dirty?
Since buttons and glue may not withstand washing, it is best to spot-clean the craft if it gets dirty. Use a damp cloth or sponge to gently clean the surface.
Related: DIY Snowman Wine Glass Candle Holder
Where can I buy buttons in bulk?
I love finding bulk buttons on Amazon. They have everything from wood buttons new, old, any color and size. I go a little crazy when shopping here because I use my free Amazon Gift Cards and pay nothing out of pocket for them.
Another one of my favorite places to find bulk buttons is on Etsy. This is a great place to find super fun vintage buttons in every shape, size, and color. I saw a box of insect-shaped buttons recently like ladybugs, dragonflies, bumblebees, butterflies, and more!
Buttons

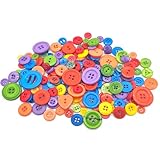
- Abundant Quantity for You to Use and Replace: there are 800 pieces buttons for sewing, coming with different shapes, butterfly, star, heart, strawberry, petal, apple shape and round shape, enough for you to use and replace
- Reliable and Durable: the buttons for crafts are made of quality resin, soft and light, not easy to deform or break, comfortable to touch, you can use them with ease and confidence, no need to worry about change them frequently

- Package includes approx. 640 pieces of resin buttons.the plastic round buttons can be meet your various needs.,you can diy Christmas crafts project to celebrate Christmas
- Rich colors, sizes and shapes in this bag of buttons. It has 4 sizes: 0.35 inch (8.9mm), 0.45 inch (11.5 mm), 0.6 inch (15 mm), 0.79 inch (20 mm). Most of buttons have its special style and colors, especially the holes design, which makes your buttons extraordinary.
- 【Premium Material】Our buttons for crafts are made of durable resin, can be sewn, glued, or taped to many different surfaces. The set includes 1000 buttons, enough to cover many kind of projects to meet your needs.
- 【Variety Design】Our buttons set offers a random wide variety of shapes, sizes (0.5 – 1 in), and colors for hours of fun and endless options for crafts.
Can I use this craft as a gift or a party activity?
Yes, the button snowman craft makes a lovely handmade gift or can be used as a fun activity for parties or gatherings. You can provide all the necessary materials and let guests create their own adorable snowmen.
Materials needed for DIY Button Snowman Craft
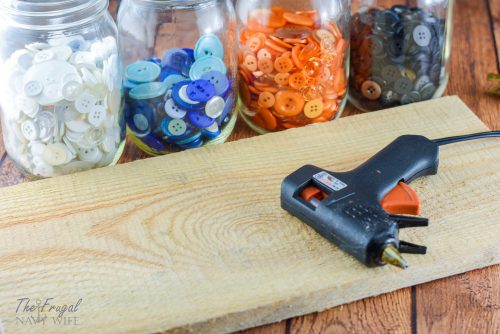
Pallet Board (7″ x 13″ shown)
Sanding Block (optional)
Related: Let it Snow Borax Snowman Craft with Free Printable
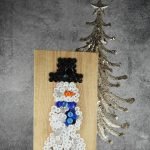
Directions to make DIY Button Snowman Craft
Sand your pallet board if desired. I usually knock off a few stray pieces of wood and the rough-cut edges by lightly sanding them. You could also paint it now if desired, something with glitter to it would look amazing!
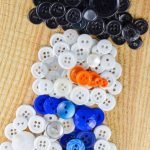
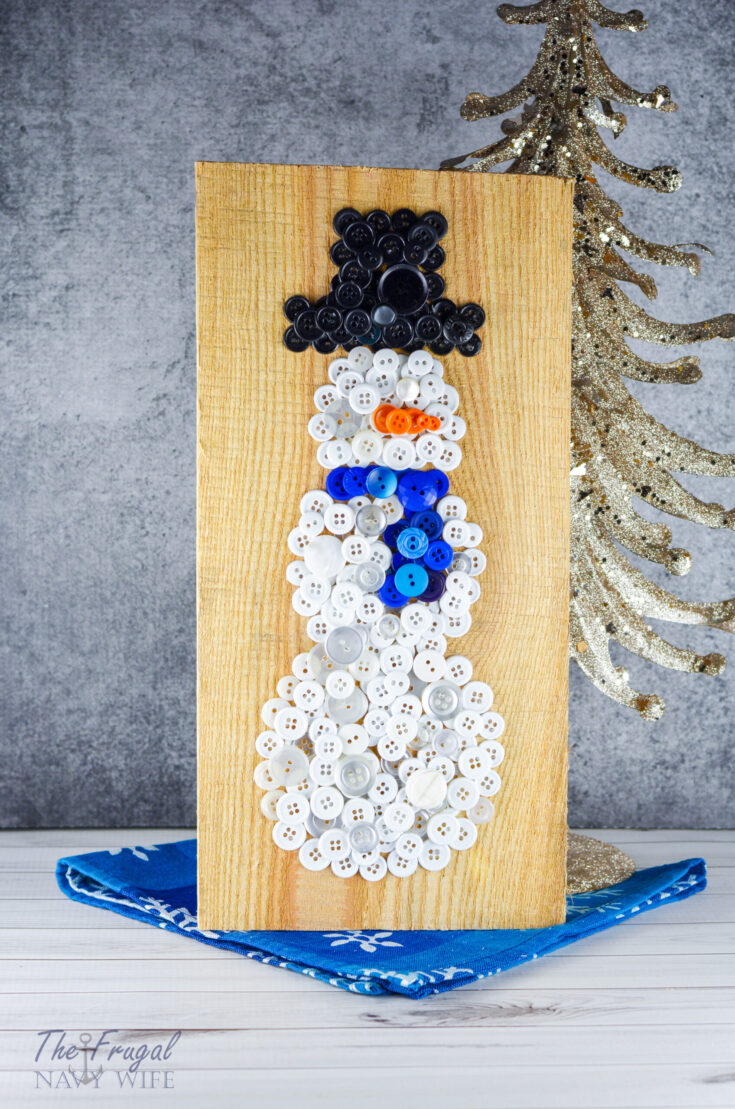
Place your board on a flat surface and begin to lay out the outline of the snowman's body shape. I started with the bottom and moved to the top. Add the hat at the top and remove and adjust some buttons to add a blue scarf.
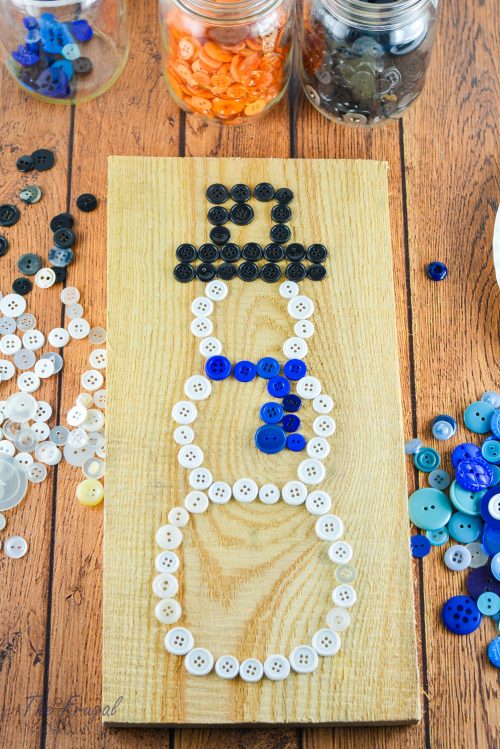
Using a hot glue gun, glue your button outline onto the board.
Fill in the body, and hat with additional white and black buttons.
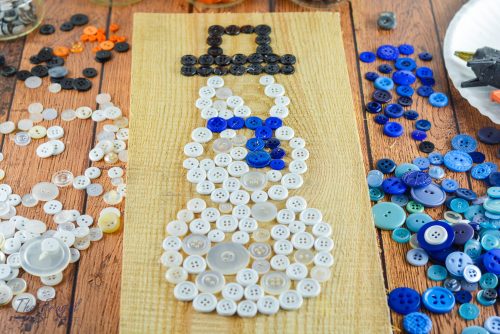
Repeat by adding a second and third (if desired) layer of buttons with hot glue.
Related: 33 Easy Kids Christmas Crafts
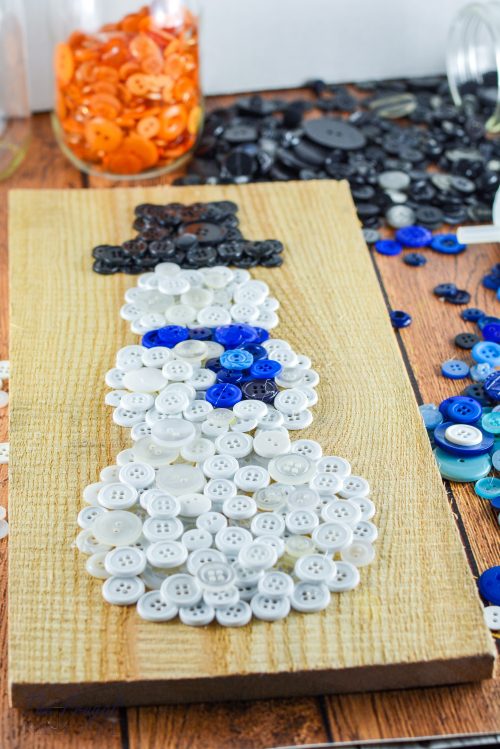
Finish by adding the nose with small orange buttons.
Take an old toothbrush and lightly scrub your buttons to remove the hot glue strings and help you determine which buttons need a little more glue.

That's it! I'd let it dry completely overnight then add it to your new winter decor the next day!
DIY Button Snowman Craft
Materials
- Pallet Board (7" x 13" shown)
- Sanding Block (optional)
- White Buttons
- Black Buttons
- Blue Buttons
- Orange Buttons
- Old Toothbrush
Tools
- Hot Glue Gun
Instructions
- Sand your pallet board if desired. I usually knock off a few stray pieces of wood and the rough-cut edges by lightly sanding them. You could also paint it now if desired, something with glitter to it would look amazing!
- Place your board on a flat surface and begin to lay out the outline of the snowman's body shape. I started with the bottom and moved to the top. Add the hat at the top and remove and adjust some buttons to add a blue scarf.
- Using a hot glue gun, glue your button outline onto the board.
- Fill in the body, and hat with additional white and black buttons.
- Repeat by adding a second and third (if desired) layer of buttons with hot glue.
- Finish by adding the nose with small orange buttons.
- Take an old toothbrush and lightly scrub your buttons to remove the hot glue strings and help you determine which buttons need a little more glue.
- That's it! I'd let it dry completely overnight then add it to your new winter decor the next day!
Notes
- You can personalize your snowman to your liking: add eyes, buttons, a different hat, and arms!
Recommended Products
As an Amazon Associate and member of other affiliate programs, I earn from qualifying purchases.

This DIY Button Snowman Craft is a delightful and whimsical project that allows you to showcase your creativity while spreading the joy of the winter season. From selecting the perfect buttons to arranging them in unique patterns, this craft offers endless possibilities for personalization. Whether you choose to use your button snowmen as ornaments, gifts, or simply as charming decorations around your home, they are sure to bring a smile to everyone's face. So gather your materials, let your imagination run wild, and enjoy the process of crafting these adorable button snowmen. Embrace the magic of the season and create memories that will last a lifetime!
This is just too too cute!! Super easy and I basically have everything to do it. Thanks for the tutorial 🙂
I just found your blog. I love your snowman. Great job.