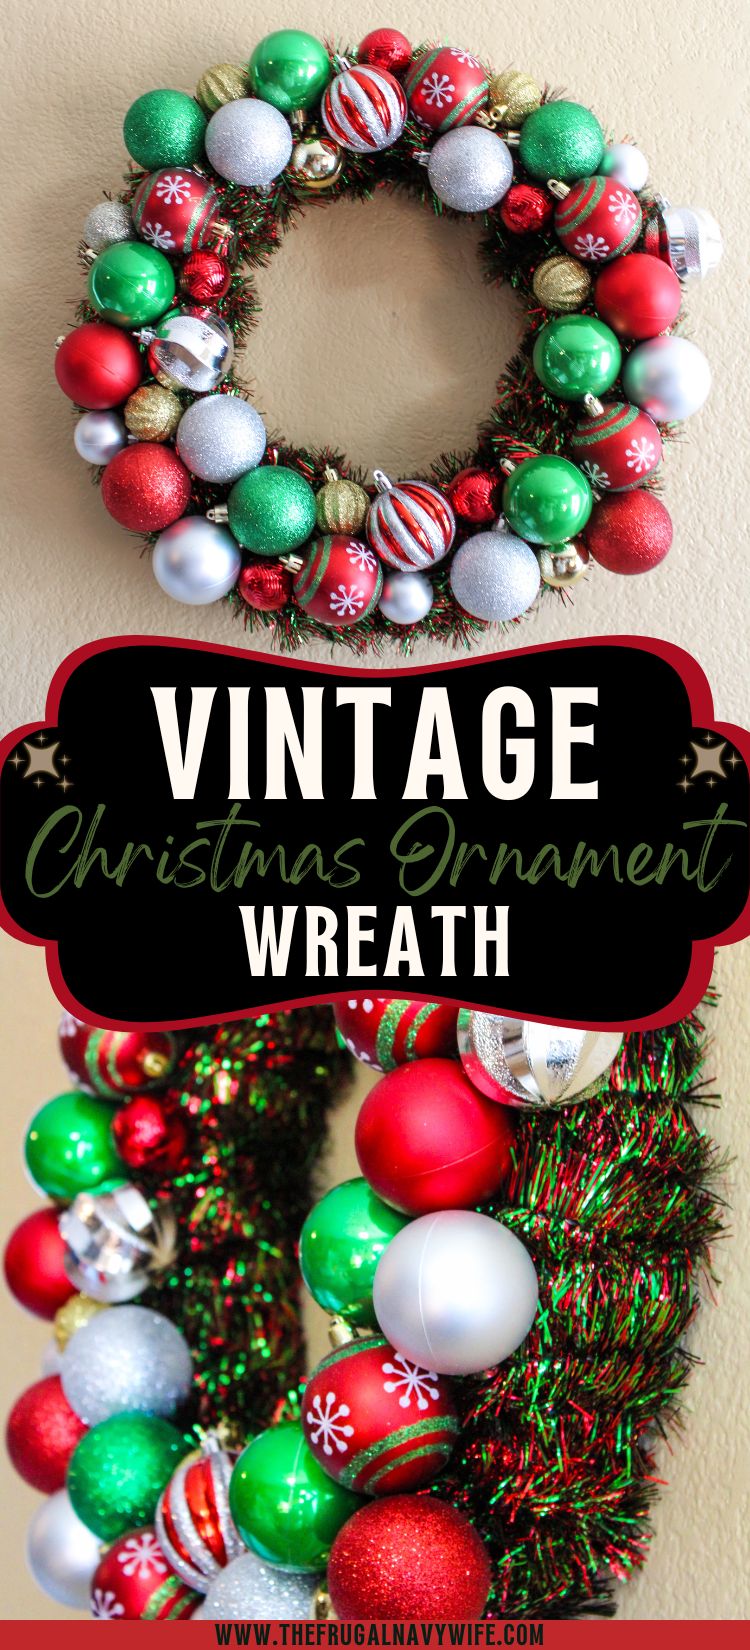
Vintage Christmas ornaments are making a huge comeback as people enjoy feeling the nostalgia associated with them. Vintage ornaments have a look all their own, typically pastel and gently aged, with lots of faux snow sprinkles and glitz. And while many shoppers are snatching these up to hang on their trees, many folks are digging them out to use in other ways. This holiday season, why not try crafting your very own vintage Christmas ornament wreath?
How do I store a vintage ornament wreath?
To ensure the longevity of your vintage ornament wreath, it's best to store it in a cool, dry place. You can wrap the wreath in tissue paper or bubble wrap and place it in a sturdy box to protect it from dust and potential damage.
Related: Easy DIY Snowman Wine Glass Candle Holder
Wreath Storage

- PROTECTED – Provide a safe sanctuary for your holiday wreaths. Bid farewell to irreversible damage and welcome the joy of retrieving your wreaths in the same pristine condition in which you stored them.
- BREATHABLE – Crafted from 600D Oxford fabric these lightweight bags breathe life into your wreaths during their stay in your storage space. The smooth exterior is built to last, allowing you to enjoy the beauty and functionality of these bags for many joyful years to come.

- Deck the Halls and Store It All: When it's time to store your Christmas cheer for next year, our wreath storage containers with lids are the perfect solution. They are ideal for keeping faux wreaths looking full and vibrant until it's time to display.
- The Right Size: Each spacious wreath storage box measures 27″ L x 24.5″ W x 7″ H. It has a secure clear lift-off lid, 4-way latches, and a handle that's perfect for hiding your holiday wreaths.

- SPACIOUS AND VERSATILE: This christmas wreath storage bag can comfortably fit wreaths up to 36 inches, and its roomy design allows for storing multiple wreaths or other seasonal items like garlands and lights
- DURABLE MATERIAL: Made from robust, tarp-like fabric, the bag is built to last and withstand the rigors of storage in various environments such as garages or attics
Can I display the wreath outdoors?
Vintage ornament wreaths are primarily designed for indoor use due to the delicate nature of the ornaments. If you do choose to display it outdoors, it's important to protect it from harsh weather conditions like rain or snow to prevent damage.
How do I clean a vintage ornament wreath?
Cleaning a vintage ornament wreath requires gentle handling. You can use a soft brush or a hairdryer on a low setting to remove any dust or debris. Avoid using water or cleaning solutions, as they can damage the ornaments.
Related: Hand Painted Wine Glasses – DIY Santa Wine Glasses Votive Holders
Where can I find vintage ornament wreaths to purchase?
You can find vintage ornament wreaths for purchase online on platforms like Etsy or eBay. There are also specialty stores that specialize in vintage holiday decor where you may find these unique wreaths.
Supplies Needed to make your own vintage Christmas Ornament Wreath
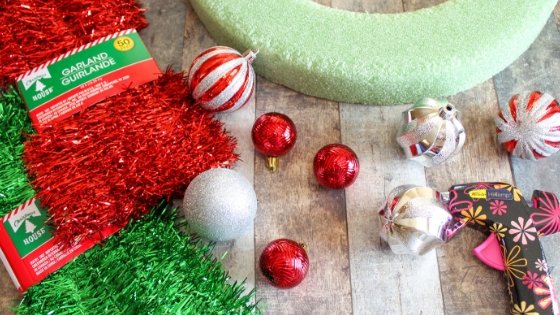
Silver and gold tinsel garland or red and green.
Assorted Vintage Christmas Ornaments
Ribbon for hanging (optional)
A few things before you begin: For our sample wreath, we found all of the crafting supplies at our local Hobby Lobby. We printed off the 40% off coupon to take with us as the wreath forms are typically around $8. You want to pay a little more for the green crafting foam wreath as opposed to the white foam ones which tend to snap. For glue, be sure to use a low-heat glue stick so it does not cause the glass ornaments to shatter. A high-heat glue may be too hot.
Related: 15 of the Best DIY Snowflake Decorations
For the vintage ornaments, we gathered these in a variety of places. Some of the larger ones were found at a local antique shop for around $1 each. We were able to get the smaller ones at thrift stores for just a few dollars a bag. You can also find them on Esty but they may cost a little more. Let family and friends know you are searching for these and who knows, maybe they have some in the attic they are willing to share with you.
Alright, now let’s begin!
Directions for making your vintage Christmas ornament wreath
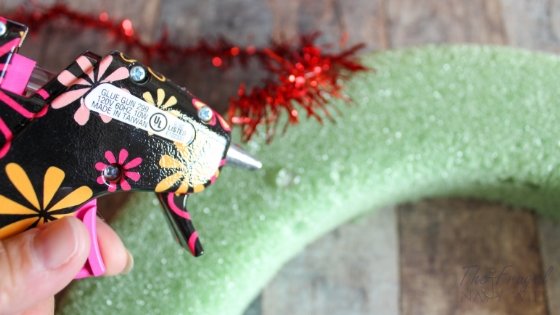
You first want to create the base of your wreath. Start by wrapping gold or silver tinsel garland around the form. Add a dab of glue in the spot where you begin to secure it to the form. Add a second dab to the end piece when finishing. Now, adjust the tinsel to make sure it is even and all spots are covered.
Here is where you get creative. It is time to get those ornaments on! Start by placing a generous dab of glue on the ornaments right before you are ready to place them. Place your larger ornaments first near the top, bottom, and each side of the wreath. These will be your “anchor” ornaments that you will then fill in around. Press firmly to the wreath so the ornament has a chance to secure itself. 5 or so large ornaments are all you need, as you will then use your medium and small ones to fill in around them.
Related: 15 DIY Christmas Wreaths Ideas You Will Love
After you have glued larger ornaments on, you want to start filling in with medium ornaments. Add glue to each ornament and press them firmly to the colored tinsel. Work your way around the larger ornaments, almost as if you are building around them.
As you are gluing, it is important to secure each ornament to the ornaments next to them. You can do this by adding a dab of glue to the side of each ornament and then pressing it into the side of the one next to it. This way they will act as reinforcement to each other.
Now start filling in empty areas with the smallest ornaments in your collection. Repeat the process by adding glue and securing them into any spots that need a little color.
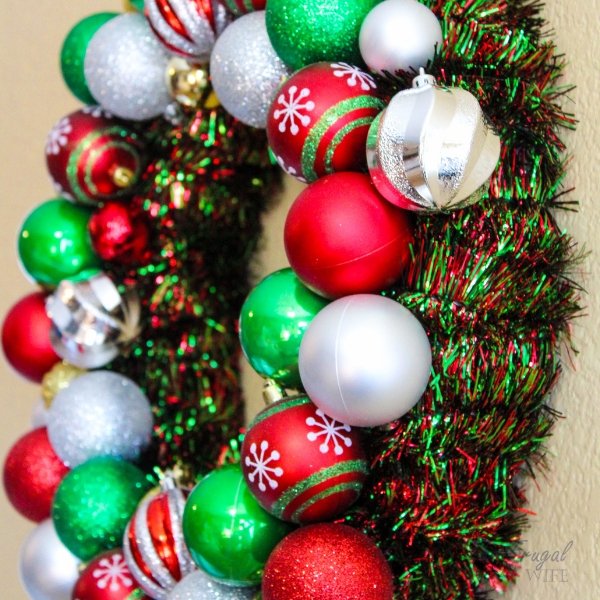
Take a step back and look at your wreath. If any spots seem uneven, add more ornaments to add some bulk or finish the shape of the wreath. Once you get it hung up, you are not likely to notice little imperfections so don’t feel the need to see that it is perfectly symmetrical.
It is perfectly fine for tinsel to show through. It adds some fun sparkle. So don’t concern yourself if you see some. It only adds to it!
Related: Easy DIY Button Snowman Craft – Button Art Idea
You are all finished! Hang your vintage Christmas ornament wreath on a wreath hook or drape ribbon through for hanging. This Christmas ornament wreath is sure to be a conversation piece in your house as it is sure to add some nostalgic holiday sparkle. Gather up your supplies and try your hand at making one and see how easy it is!
Vintage Christmas Ornament Wreath
Making a Vintage Ornament Wreath for Christmas is a way to use ornaments in a way that is fresh and exciting. Creating one is a lot easier than you think.
Tools
- Hot Glue Gun
Instructions
- You first want to create the base of your wreath. Start by wrapping gold or silver tinsel garland around the form. Add a dab of glue in the spot where you begin to secure it to the form. Add a second dab to the end piece when finishing. Now, adjust the tinsel to make sure it is even and all spots are covered.
- Here is where you really get creative. It is time to get those ornaments on! Start by placing a really generous dab of glue on the ornaments right before you are ready to place them. Place your larger ornaments first near the top, bottom, and each side of the wreath. These will be your “anchor” ornaments that you will then fill in around. Press firmly to the wreath so the ornament has a chance to really secure itself. 5 or so large ornaments are all you need, as you will then use your medium and small ones to fill in around them.
- After you have glued larger ornaments on, you want to start filling in with medium ornaments. Add glue to each ornament and press them firmly to the colored tinsel. Work your way around the larger ornaments, almost as if you are building around them.
- As you are gluing, it is important to secure each ornament to the ornaments next to them. You can do this by adding a dab of glue to the side of each ornament and then press it into the side of the one next to it. This way they will act as reinforcement to each other.
- Now start filling in empty areas with the smallest ornaments in your collection. Repeat the process by adding glue and securing them into any spots that need a little color.
- Take a step back and look at your wreath. If any spots seem uneven, add more ornaments to add some bulk or finish the shape of the wreath. Once you get it hung up, you are not likely to notice little imperfections so don’t feel the need to see that it is perfectly symmetrical.
- It is perfectly fine for tinsel to show through. In fact, it adds some fun sparkle. So don’t concern yourself if you see some. It only adds to it!
Recommended Products
As an Amazon Associate and member of other affiliate programs, I earn from qualifying purchases.

Vintage ornament wreaths are a delightful addition to any holiday decor. With their nostalgic charm and unique character, these wreaths bring a touch of yesteryear to your home during the festive season. Whether you choose to purchase a pre-made vintage ornament wreath or embark on a DIY project, the beauty and craftsmanship of these wreaths are sure to captivate all who see them. From the carefully curated selection of vintage ornaments to the meticulous arrangement on a wreath base, these wreaths are a labor of love that celebrates the holiday spirit in a truly special way. So, embrace the magic of the past and adorn your home with a vintage ornament wreath this holiday season.
Leave a Reply