Glitter jars are all the rage right now and for good reason – they are so easy to make and look super chic. Plus, you can upcycle old jars to create them, which makes them even more affordable. This tutorial will show you how to make your own glitter jar in just a few simple steps.

Glitter Jars – Super Easy Upcycled DIY
If you're looking for a fun and easy way to add some glitter to your life, then these DIY glitter jars are perfect for you. Not only are they cheap and easy to make, but they also make great decorations for parties or special occasions.
Related: Amazing Upcycled Hot Wheels Cars Picture Frame Idea
What is an upcycled craft?
Upcycled crafts are crafts made from materials that would otherwise be thrown away. This can include things like used paper, fabric, or even plastic bags.
One of the best things about upcycled crafts is that they're a great way to reduce waste. Not only do they help you use materials that would have otherwise gone to waste, but they also help you avoid buying new materials, which can be expensive and environmentally damaging.
Upcycled crafts are also a great way to show your creativity. There are no limits to what you can make using recycled materials!
What you need for Upcycled Glitter Jars
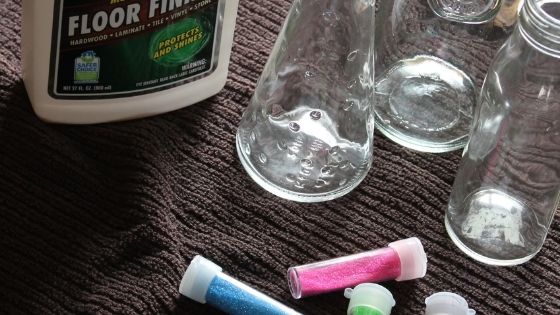
Empty Glass Jars
Related: 40+ Ways to Upcycle Old Sweaters
How to make Upcycled Glitter Jars
Wash your glass jars and allow them to air dry fully.
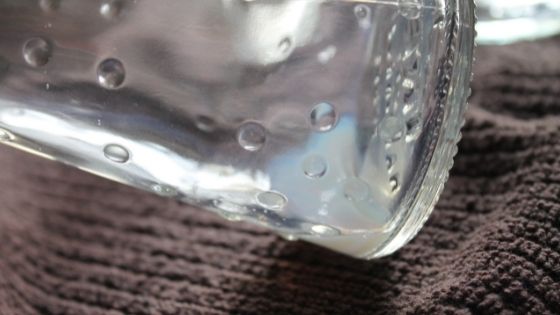
Pour a small amount of Floor finish into the jar. (You can use any brand floor finish; you are just looking for the kind that “Resurfaces” the floor. Pledge makes one as well as the brand I used here.) Roll the jar to evenly cover the inside of the jar. Dump out excess.
Try to avoid shaking the jar, the air bubbles do not allow the glitter to stick.
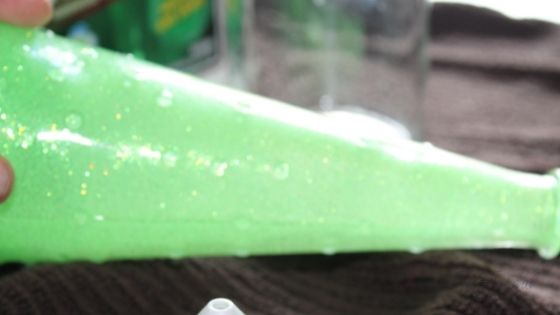
Dump in the glitter. Roll jar again to cover all surfaces with glitter. Dump out excess glitter. Allow airing to dry.
Related: 25 DIY Home Decor Projects
Glitter Jars - Super Easy Upcycled DIY
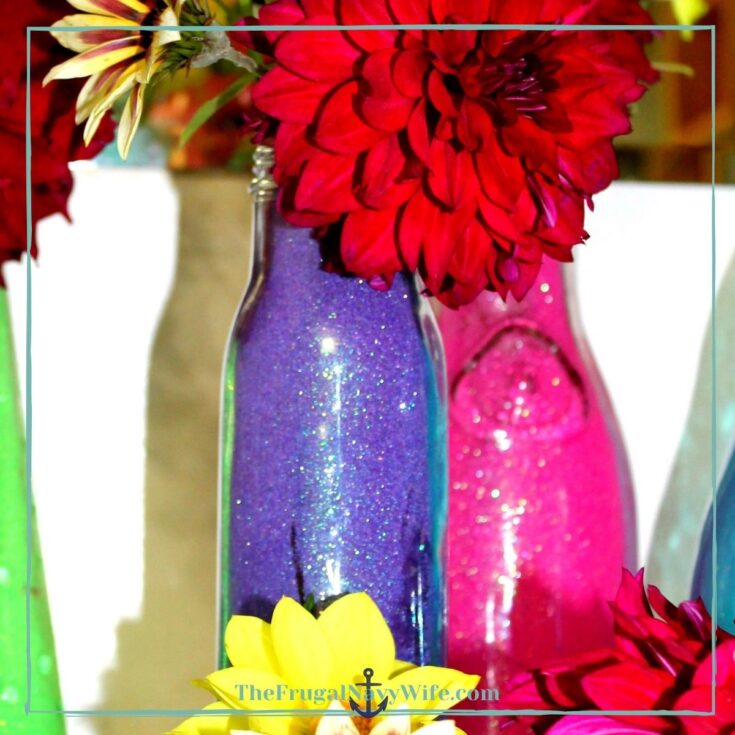
A simple and easy way to glam up your home decor on a budget. These glitter jars are easily customized and perfect for any season.
Materials
- Floor Finish
- Fine Glitter
- Empty Glass Jars
Instructions
- Wash your glass jars and allow them to air dry fully.
- Pour a small amount of Floor finish into the jar. (You can use any brand floor finish; you are just looking for the kind that “Resurfaces” the floor. Pledge makes one as well as the brand I used here.) Roll the jar to evenly cover the inside of the jar. Dump out excess.
- Try to avoid shaking the jar, the air bubbles do not allow the glitter to stick.
- Dump in the glitter. Roll jar again to cover all surfaces with glitter. Dump out excess glitter. Allow airing to dry.
Notes
These are not waterproof; you cannot use them for eating.
Recommended Products
As an Amazon Associate and member of other affiliate programs, I earn from qualifying purchases.


So there you have it! A simple and easy way to glam up your home decor on a budget. These glitter jars are perfect for any season, and they can be customized to match any color scheme. And the best part is that they’re made from recycled materials, so you can feel good about yourself while looking stylish. Have you tried making these glitter jars? If so, share your photos with us in the comments. We can’t wait to see them!
Leave a Reply